Processing an activity
To create a new activity record:

Click

next to the
Activities section on the
Details tab of the case
OR
Click

in the
Activities tab of the case record.
While providing slightly different views of the activity record for the case, either of the above methods yield the same result. It is largely a matter of personal preference which you choose to use.
1 Locate and open the case for which you want to record an activity.
2 Using either of the methods above, open a new activity page.
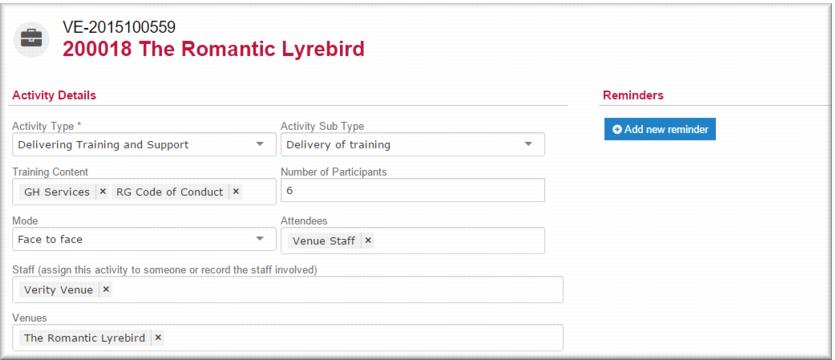
3 In the
Activity Type field,

select the activity type.
4 In the
Activity Sub Type field,

select the required sub type.
5 If applicable, in the
Training Content field,

select the training program or programs related to this activity.
| See Activities for a list of the activity types and sub types. |
6 In the
Mode field,

select the contact mode:
Face to face Telephone Online Other.
7 In the Staff field the name of the venue support workers for the case defaults. You can change this if required.
8 In the Venues field, the name of the venue defaults.
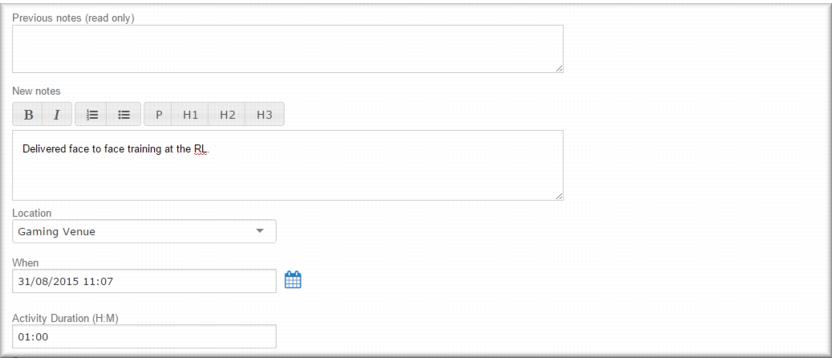
9 In the New notes field enter a note about activity.
| When you save the activity, the notes you enter here will display in the Previous Notes (read only) field. |
10 In the
Location field,

select the location where the activity took place.
11 In the
When field,

select the date and time of the activity.
12 In the
Activity Duration (H:M) field

select the duration of the activity.
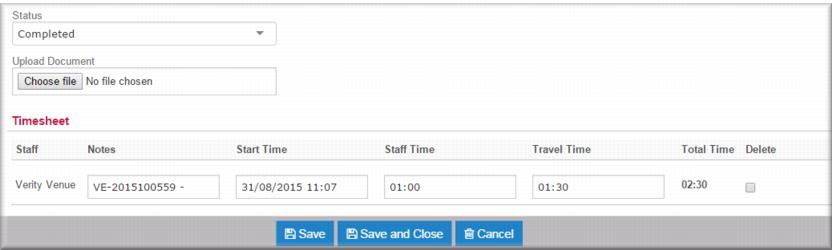
13 In the
Status field,

select
Completed.
The Timesheet displays at the bottom of the page. If you specified a duration for the activity this value now displays in the Staff time field. 14 In the Timesheet specify staff and travel time as applicable.
15 Click

.
The activity is completed. The notes you wrote for the activity display in the Previous notes (read only) field.
![MCj04347500000[1]](../GHC102/images/GHC-102-PM.1.127.07.jpg)
![MCj04347500000[1]](../GHC102/images/GHC-102-PM.1.127.10.jpg)